









Blog
Best Welding Positioners for Busy Workshops
A weld that is awkward to reach is slower to produce, harder to inspect and more likely to need dressing or rework. The best welding positioners for workshops put the joint in the right attitude before the arc is struck, allowing the operator to weld in the flat or horizontal position rather than fighting overhead, vertical or restricted-access work.
For a fabrication shop, a positioner is not simply a convenience item. It is a production tool. It can reduce handling time, improve consistency around circumferential welds and make it easier to maintain a controlled travel speed. The right unit depends less on the headline load capacity than on the workpiece’s centre of gravity, clamping method, required rotation speed and the type of jobs passing through the workshop.
What makes a welding positioner suitable for workshop use?
A workshop positioner needs to match the fabrication work, not just lift its quoted maximum weight. A compact unit rotating small brackets, flanges and valve components has very different requirements from a machine carrying a fabricated vessel, pipe spool or structural assembly.
The key distinction is between load capacity and eccentric loading. Manufacturers normally state a capacity with the load centred close to the faceplate. When a heavy component projects well beyond the table, the turning force rises sharply. A positioner rated for 300 kg may be entirely suitable for a centred flange but unsuitable for a lighter, long and unbalanced frame. Always assess the load’s centre of gravity, its offset from the rotation axis and the torque required to start and stop it safely.
Rotation control matters just as much. For MIG/MAG welding, a broad variable-speed range is useful because travel speed can be matched to weld size, heat input and joint geometry. For TIG work on thin-wall tube or stainless assemblies, very slow, steady rotation is often the priority. A jerky drive or poor low-speed control can spoil an otherwise sound setup.
Types of welding positioners and where they fit
Bench-top rotary positioners
Bench-top rotary positioners are the practical starting point for many general fabrication and maintenance workshops. They are suited to smaller fabricated parts, brackets, circular flanges, housings and repeat batches where the component can be secured directly to a faceplate or fixture.
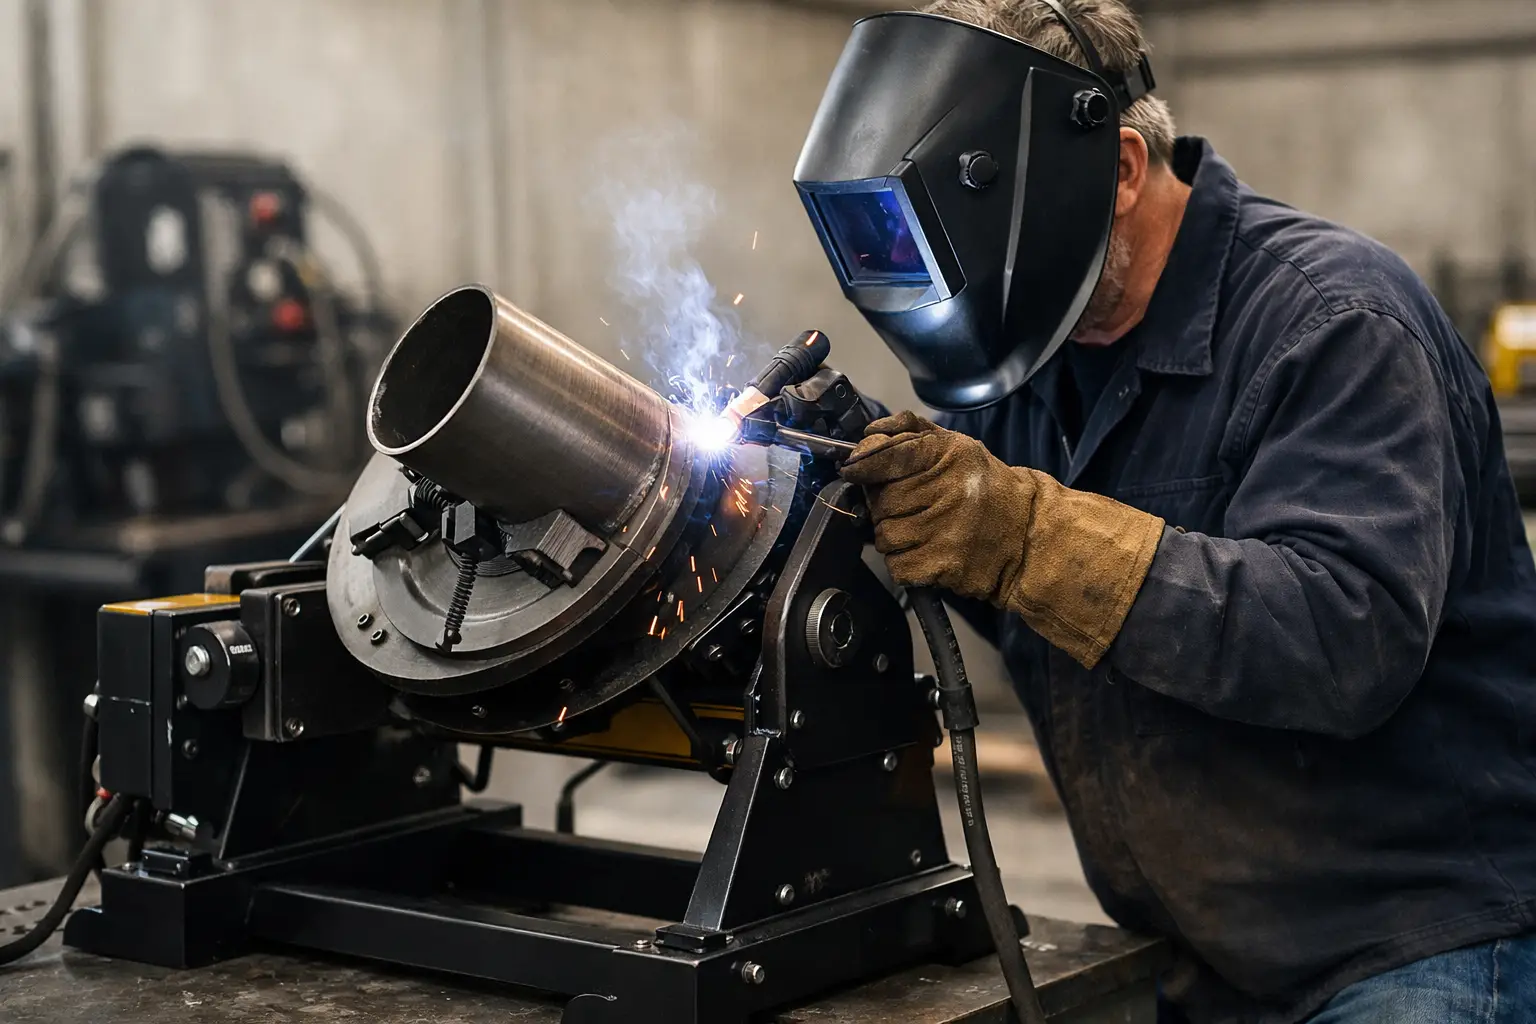
Look for a stable base, a properly sized faceplate with useful mounting slots, a variable-speed drive and a foot pedal where hands-free start and stop control will improve welding access. A tilting table adds value where a joint needs to be presented at an angle, but check whether the rated load applies at every tilt position. Some compact models are best treated as rotary tables rather than full tilt-and-rotate machines.
These units offer a strong return where one welder repeatedly handles parts in the 10 kg to 100 kg range. They take little floor space, are quick to commission and can be fitted with simple dedicated jigs for repeat production.
Tilt-and-rotate positioners
Tilt-and-rotate positioners are better suited to heavier or more complex fabrications that need to be presented at several angles. The ability to incline the faceplate lets the operator place fillet welds and seams in a more favourable position without repeated crane handling or manual turning.
This type of equipment deserves closer attention to safety. The work must be clamped or bolted to a fixture rated for the job, not merely held with a couple of tack welds. Check that the tilt mechanism is positively locked or power-controlled as specified, and ensure the assembly will not swing unexpectedly as its centre of gravity moves through the rotation axis.
For workshops producing machine guards, fabricated supports, tanks, manifolds and similar assemblies, a tilt-and-rotate unit can make a noticeable difference to setup time. It does, however, require clear space around the machine and a realistic plan for loading parts with a crane, jib or forklift.
Headstock and tailstock positioners
Where work is long, cylindrical or awkwardly shaped, headstock and tailstock systems provide better support than a single faceplate. The driven headstock rotates the job while the tailstock supports the far end, reducing deflection and limiting the risk of an unstable load.
They are a sensible choice for shafts, beams, pipe spools, vessel sections and long fabricated frames. Adjustable centre distance is particularly useful in a mixed-job workshop, but the tailstock must be sized to carry the expected load and clamping force. A revolving centre alone may not be enough for a part that is out of balance or subject to welding distortion.
The strongest case for this arrangement is repeat work with long assemblies. Once fixtures are established, the operator can maintain continuous weld runs with far less repositioning. For occasional one-off jobs, the extra floor space and setup time may not justify the investment.
Pipe rotators and turning rolls
Pipe rotators support the work on powered and idler wheels, making them suitable for cylindrical vessels, ducts, large pipe sections and tanks. Rather than gripping the component at one end, the rolls support it along its diameter. This reduces the need for complex end fixtures and allows large round workpieces to be rotated steadily.
Turning rolls are not the answer for every pipe job. They rely on a reasonably round, balanced shell and adequate friction between the wheels and the workpiece. Small diameters, eccentric fittings and assemblies with protruding branches may need a different setup. For heavier fabrication, self-aligning roll sets can reduce adjustment time across varying diameters, while conventional adjustable rolls may offer more control on a fixed range of work.
Choosing capacity: do not buy on kilogrammes alone
Capacity figures are useful, but they are only the first filter. Before selecting a positioner, record the typical maximum workpiece weight, dimensions and loading method. Then consider the worst-case component, not the easiest one.
A sound specification should account for:
- centred and off-centre load capacity at the intended table angle;
- faceplate diameter and fixture mounting options;
- torque at low speed, particularly for unbalanced assemblies;
- rotation speed range and control accuracy;
- available electrical supply, control lead length and foot pedal operation;
- lifting arrangements, guarding and clearance around the rotating job.
Avoid working continually at the top end of a unit’s rating. Allowing a sensible margin protects the drive, bearings and gearing, and gives the workshop capacity for fixtures, clamps and future work. A fixture can add significant dead weight before the fabricated component is even loaded.
Fixtures determine whether the positioner earns its keep
A good positioner with poor workholding is still a poor welding setup. Fixtures must locate the part accurately, hold it securely through rotation and leave access to the weld area. They should also account for heat movement. Fully locking a part at every point can create distortion problems as the weld contracts.
For repeat items, purpose-made fixtures often provide the fastest payback. A simple plate with locating pins, clamps and replaceable stops can cut setup time on flanges, elbows, brackets and welded assemblies. T-slots or threaded holes in the faceplate make these fixtures easier to adapt, but verify the bolt grade, engagement depth and loading direction before use.
Earthing deserves attention. Do not rely on bearings, gears or the positioner’s structure as the welding current path. Fit a suitable earth connection directly to the rotating work or use an appropriately rated rotary earth arrangement where continuous rotation is required. This reduces the risk of arcing damage to bearings and electrical components.
Controls that help the welder, not just the specification sheet
Variable speed is essential, but control layout affects real productivity. A foot pedal allows the welder to start, stop and regulate rotation while holding the torch and maintaining body position. A clear forward/reverse selector is useful when completing short seams or correcting position, while a stop function should halt motion predictably without excessive overrun.
For repetitive circumferential welds, consider whether the positioner needs integration with a welding timer, torch support or a simple indexing arrangement. Not every workshop needs automated welding, but repeatable rotation makes manual welding more consistent and can simplify operator training.
Check the duty cycle of the drive system as well. A unit used for short intermittent positioning is different from one rotating through long weld runs all day. If the work involves preheat, heavy deposits or prolonged arc-on time, select equipment intended for sustained use in an industrial environment.
Safe use starts before loading
Positioners create pinch points, rotating masses and changing load balance. The operator should inspect clamps, fixture bolts, cables and controls before each shift, particularly after moving or changing a fixture. Keep leads clear of the table and workpiece, and prevent torch hoses from wrapping around the rotating assembly.
Do not rotate a job with loose tools, wedges or unrestrained components on the fixture. Loading should be carried out with the table locked or stationary, and lifting equipment should not be removed until the work is properly secured. Where a load is irregular or its balance is uncertain, test rotation slowly and stand clear of the likely swing path.
The best setup lets the welder concentrate on puddle control and joint quality rather than wrestling the component into position. Specify the positioner around the real workpiece, build proper fixtures and leave capacity for the jobs that are likely to arrive next. That approach will give a workshop equipment that improves throughput from the first repeat batch, rather than a machine that spends its life parked against the wall.
Best Welding Positioners for Busy Workshops
A weld that is awkward to reach is slower to produce, harder to inspect and more likely to need dressing or rework. The best welding positioners for workshops put the joint in the right attitude before the arc is struck, allowing the operator to weld in the flat or horizontal position rather than fighting overhead, vertical or restricted-access work.
For a fabrication shop, a positioner is not simply a convenience item. It is a production tool. It can reduce handling time, improve consistency around circumferential welds and make it easier to maintain a controlled travel speed. The right unit depends less on the headline load capacity than on the workpiece’s centre of gravity, clamping method, required rotation speed and the type of jobs passing through the workshop.
What makes a welding positioner suitable for workshop use?
A workshop positioner needs to match the fabrication work, not just lift its quoted maximum weight. A compact unit rotating small brackets, flanges and valve components has very different requirements from a machine carrying a fabricated vessel, pipe spool or structural assembly.
The key distinction is between load capacity and eccentric loading. Manufacturers normally state a capacity with the load centred close to the faceplate. When a heavy component projects well beyond the table, the turning force rises sharply. A positioner rated for 300 kg may be entirely suitable for a centred flange but unsuitable for a lighter, long and unbalanced frame. Always assess the load’s centre of gravity, its offset from the rotation axis and the torque required to start and stop it safely.
Rotation control matters just as much. For MIG/MAG welding, a broad variable-speed range is useful because travel speed can be matched to weld size, heat input and joint geometry. For TIG work on thin-wall tube or stainless assemblies, very slow, steady rotation is often the priority. A jerky drive or poor low-speed control can spoil an otherwise sound setup.
Types of welding positioners and where they fit
Bench-top rotary positioners
Bench-top rotary positioners are the practical starting point for many general fabrication and maintenance workshops. They are suited to smaller fabricated parts, brackets, circular flanges, housings and repeat batches where the component can be secured directly to a faceplate or fixture.
Look for a stable base, a properly sized faceplate with useful mounting slots, a variable-speed drive and a foot pedal where hands-free start and stop control will improve welding access. A tilting table adds value where a joint needs to be presented at an angle, but check whether the rated load applies at every tilt position. Some compact models are best treated as rotary tables rather than full tilt-and-rotate machines.
These units offer a strong return where one welder repeatedly handles parts in the 10 kg to 100 kg range. They take little floor space, are quick to commission and can be fitted with simple dedicated jigs for repeat production.
Tilt-and-rotate positioners
Tilt-and-rotate positioners are better suited to heavier or more complex fabrications that need to be presented at several angles. The ability to incline the faceplate lets the operator place fillet welds and seams in a more favourable position without repeated crane handling or manual turning.
This type of equipment deserves closer attention to safety. The work must be clamped or bolted to a fixture rated for the job, not merely held with a couple of tack welds. Check that the tilt mechanism is positively locked or power-controlled as specified, and ensure the assembly will not swing unexpectedly as its centre of gravity moves through the rotation axis.
For workshops producing machine guards, fabricated supports, tanks, manifolds and similar assemblies, a tilt-and-rotate unit can make a noticeable difference to setup time. It does, however, require clear space around the machine and a realistic plan for loading parts with a crane, jib or forklift.
Headstock and tailstock positioners
Where work is long, cylindrical or awkwardly shaped, headstock and tailstock systems provide better support than a single faceplate. The driven headstock rotates the job while the tailstock supports the far end, reducing deflection and limiting the risk of an unstable load.
They are a sensible choice for shafts, beams, pipe spools, vessel sections and long fabricated frames. Adjustable centre distance is particularly useful in a mixed-job workshop, but the tailstock must be sized to carry the expected load and clamping force. A revolving centre alone may not be enough for a part that is out of balance or subject to welding distortion.
The strongest case for this arrangement is repeat work with long assemblies. Once fixtures are established, the operator can maintain continuous weld runs with far less repositioning. For occasional one-off jobs, the extra floor space and setup time may not justify the investment.
Pipe rotators and turning rolls
Pipe rotators support the work on powered and idler wheels, making them suitable for cylindrical vessels, ducts, large pipe sections and tanks. Rather than gripping the component at one end, the rolls support it along its diameter. This reduces the need for complex end fixtures and allows large round workpieces to be rotated steadily.
Turning rolls are not the answer for every pipe job. They rely on a reasonably round, balanced shell and adequate friction between the wheels and the workpiece. Small diameters, eccentric fittings and assemblies with protruding branches may need a different setup. For heavier fabrication, self-aligning roll sets can reduce adjustment time across varying diameters, while conventional adjustable rolls may offer more control on a fixed range of work.
Choosing capacity: do not buy on kilogrammes alone
Capacity figures are useful, but they are only the first filter. Before selecting a positioner, record the typical maximum workpiece weight, dimensions and loading method. Then consider the worst-case component, not the easiest one.
A sound specification should account for:
- centred and off-centre load capacity at the intended table angle;
- faceplate diameter and fixture mounting options;
- torque at low speed, particularly for unbalanced assemblies;
- rotation speed range and control accuracy;
- available electrical supply, control lead length and foot pedal operation;
- lifting arrangements, guarding and clearance around the rotating job.
Avoid working continually at the top end of a unit’s rating. Allowing a sensible margin protects the drive, bearings and gearing, and gives the workshop capacity for fixtures, clamps and future work. A fixture can add significant dead weight before the fabricated component is even loaded.
Fixtures determine whether the positioner earns its keep
A good positioner with poor workholding is still a poor welding setup. Fixtures must locate the part accurately, hold it securely through rotation and leave access to the weld area. They should also account for heat movement. Fully locking a part at every point can create distortion problems as the weld contracts.
For repeat items, purpose-made fixtures often provide the fastest payback. A simple plate with locating pins, clamps and replaceable stops can cut setup time on flanges, elbows, brackets and welded assemblies. T-slots or threaded holes in the faceplate make these fixtures easier to adapt, but verify the bolt grade, engagement depth and loading direction before use.
Earthing deserves attention. Do not rely on bearings, gears or the positioner’s structure as the welding current path. Fit a suitable earth connection directly to the rotating work or use an appropriately rated rotary earth arrangement where continuous rotation is required. This reduces the risk of arcing damage to bearings and electrical components.
Controls that help the welder, not just the specification sheet
Variable speed is essential, but control layout affects real productivity. A foot pedal allows the welder to start, stop and regulate rotation while holding the torch and maintaining body position. A clear forward/reverse selector is useful when completing short seams or correcting position, while a stop function should halt motion predictably without excessive overrun.
For repetitive circumferential welds, consider whether the positioner needs integration with a welding timer, torch support or a simple indexing arrangement. Not every workshop needs automated welding, but repeatable rotation makes manual welding more consistent and can simplify operator training.
Check the duty cycle of the drive system as well. A unit used for short intermittent positioning is different from one rotating through long weld runs all day. If the work involves preheat, heavy deposits or prolonged arc-on time, select equipment intended for sustained use in an industrial environment.
Safe use starts before loading
Positioners create pinch points, rotating masses and changing load balance. The operator should inspect clamps, fixture bolts, cables and controls before each shift, particularly after moving or changing a fixture. Keep leads clear of the table and workpiece, and prevent torch hoses from wrapping around the rotating assembly.
Do not rotate a job with loose tools, wedges or unrestrained components on the fixture. Loading should be carried out with the table locked or stationary, and lifting equipment should not be removed until the work is properly secured. Where a load is irregular or its balance is uncertain, test rotation slowly and stand clear of the likely swing path.
The best setup lets the welder concentrate on puddle control and joint quality rather than wrestling the component into position. Specify the positioner around the real workpiece, build proper fixtures and leave capacity for the jobs that are likely to arrive next. That approach will give a workshop equipment that improves throughput from the first repeat batch, rather than a machine that spends its life parked against the wall.