






























Blog
How to Maintain Belt Sanders for Trade Use

A belt sander that starts wandering across the rollers, burns the workpiece or throws dust through the workshop is not merely overdue a clean. It is losing accuracy, consuming abrasive belts unnecessarily and creating avoidable safety risk. In fabrication and maintenance work, where a sander may prepare weld edges, remove scale or finish steelwork for coating, reliable operation depends on routine attention. Knowing how to maintain belt sanders protects the machine, the operator and the quality of the finished job.
Start with isolation and a condition check
Before any maintenance, isolate the machine from its power supply. On fixed workshop equipment, follow the site lock-off procedure. Wait for all moving parts to stop and remove the abrasive belt before placing hands near rollers, guards or the platen.
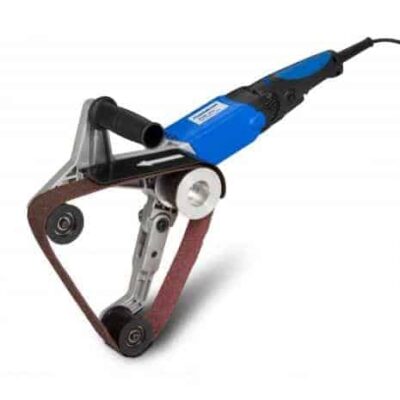
A quick visual inspection at the start of each shift often identifies faults before they become downtime. Check that guards are secure, adjustment handles lock properly and the machine is firmly mounted. Look for cracked housings, damaged switches, frayed leads and loose fasteners. A portable belt sander should also be checked for damage around the cable entry point and handle, where hard site use tends to show first.
Pay attention to vibration and noise during operation. A new rumble, high-pitched whine or repeated knocking can indicate worn bearings, a damaged drive belt, debris on a roller or an abrasive belt with a poor joint. Do not assume a noisy machine simply needs more grease. Many modern sealed bearings are not serviceable, and adding lubricant where it does not belong can attract abrasive dust and shorten component life.
Keep abrasive belts clean, dry and correctly stored
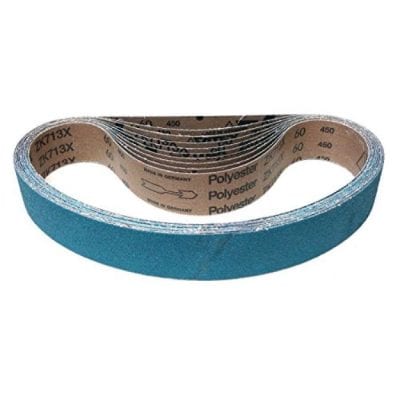
The abrasive belt is a consumable, but poor handling can make a new belt perform like a worn one. Inspect every belt before fitting it. Reject belts with torn edges, cracked backing, loose joints, glazing or contamination from oil, coolant or grease. A contaminated belt can smear material across the workpiece, generate excessive heat and reduce control.
Store belts in a dry, stable area away from direct heat and damp. Avoid leaving them on a workshop floor, against a radiator or in a vehicle where temperature and humidity fluctuate heavily. Belt backing can distort if stored badly, making tracking difficult and increasing the likelihood of belt breakage.
Use the correct grit and abrasive type for the work. Coarse belts remove weld spatter and heavy material quickly, but they leave a deeper scratch pattern and can cut aggressively at edges. Finer belts are better suited to blending and preparation, but they clog sooner if used to remove heavy scale. For stainless steel and other contamination-sensitive materials, keep belts dedicated to that material where required. Cross-contamination from carbon steel debris can compromise the finish and lead to later corrosion issues.
How to maintain belt sanders through correct tracking
Belt tracking is one of the most important adjustments on any belt sander. A belt that runs centrally and steadily across the rollers wears evenly and is less likely to catch a guard or walk off the machine. A belt that drifts to one side can damage the belt edge, score rollers and become a serious operator hazard.
Fit the belt in the direction marked by its arrow, where one is provided. Run the machine briefly at low risk, standing clear of the belt path, then adjust the tracking control in small increments. Allow the belt time to settle after each adjustment. The aim is not to force the belt hard against one roller flange, but to keep it stable and centred during normal load.
If a belt will not track consistently, stop and investigate rather than continually correcting the adjuster. Check for packed debris on the rollers, a worn or crowned tracking roller, damaged bearings, a bent spindle or a belt that has been distorted in storage. On a bench-mounted machine, also confirm the unit is level and securely fixed. Excess movement in the stand or bench can affect tracking under pressure.
Clean dust extraction paths, rollers and the platen
Metal dust is abrasive. Left inside the machine, it works into bearings, blocks extraction ports and builds up around moving parts. Cleaning is therefore a maintenance task, not an appearance exercise.
At the end of a working period, remove loose dust from the belt path, rollers, platen, guards and extraction connection using a suitable industrial vacuum. Avoid using compressed air as the default cleaning method. It can drive fine metallic particles deeper into the motor and bearing areas, as well as putting airborne dust into the workshop. If compressed air is permitted under site procedures for a particular task, use it cautiously with appropriate extraction and eye protection.
Inspect the platen closely. This is the backing surface that supports the belt during flat sanding. A worn, grooved or damaged platen produces uneven contact and makes accurate finishing harder. Some machines use a graphite or low-friction platen liner. Replace it when it is worn through, torn or heavily scored. A fresh liner reduces friction, heat and belt wear, particularly during prolonged flat grinding.
Rollers should be clean and free from deep grooves, hardened adhesive, oil or embedded particles. Build-up changes the roller profile and can cause tracking instability. Clean using a product compatible with the machine manufacturer’s guidance, and ensure all solvent residue has evaporated before restarting.
Inspect drive components before they fail
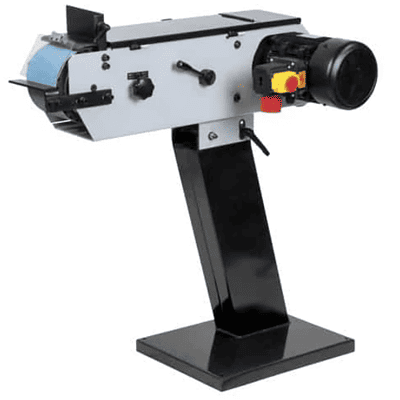
Belt sanders transfer considerable load through their drive system. On a portable model, this may involve a gearbox, drive pulley and internal belt arrangement. On larger pedestal or linisher units, there may be external belts, pulleys and tensioning systems. The inspection method depends on the machine design, but the principle is the same: components must run true, remain correctly tensioned and show no signs of abnormal wear.
Where access is provided, check drive belts for cracking, frayed edges, glazing and loss of tension. A loose drive belt can slip under load, reducing belt speed and overheating both the drive components and the abrasive. An overtightened belt can overload bearings. Set tension only to the equipment specification rather than relying on guesswork.
Check roller bearings for radial play by moving the roller gently with the machine isolated. Any noticeable looseness, rough rotation or heat build-up in use warrants replacement or professional service. Bearing failure can rapidly damage shafts and rollers, so it is usually cheaper to address early.
Also inspect the motor cooling vents. Blocked vents raise operating temperature and shorten motor life. This matters especially where the sander is used for long runs on steel, when fine dust and heat are both present.
Use the machine in a way that preserves it
Maintenance does not begin after a fault. The operator’s technique has a direct effect on service life. Let the abrasive do the cutting. Excessive pressure slows the belt, overheats the work and loads the motor, while doing little to improve removal rate. If the belt is no longer cutting efficiently, change it rather than forcing it through the job.
Use work supports, jigs and clamps where practical. Holding a small fabricated part by hand near a moving belt reduces control and can cause uneven loading on the platen and rollers. When deburring sharp edges or dressing welds, keep the work moving to avoid local heat build-up and gouging.
Dust extraction should be running whenever the machine is designed to use it. Extraction improves visibility, reduces airborne metal dust and limits the debris reaching internal components. However, extraction is not a substitute for cleaning. Fine particles still settle around the machine and inside areas that normal airflow does not reach.
Set a practical maintenance interval
The correct interval depends on use. A belt sander used occasionally for light deburring will not need the same regime as a machine running daily in a fabrication bay. The useful approach is to combine quick operator checks with planned deeper inspections.
Before use, check the belt condition, tracking, guards, cable or isolator, and extraction connection. Weekly, vacuum the belt path and motor vents, inspect rollers and platen condition, and check fasteners. At planned service intervals, inspect bearings, drive belts, switches, electrical connections and the condition of the stand or mounting arrangement.
Keep a simple record of belt changes, recurring tracking issues and replaced components. This helps identify patterns. If one machine repeatedly destroys belts, for example, the cause may be roller damage or poor alignment rather than operator error. For multi-machine workshops, this record also supports sensible spares holding, so commonly needed belts, platen liners and service parts are available before a fault stops production.
A properly maintained belt sander should run smoothly, track predictably and remove material without excessive heat or vibration. Treat those operating characteristics as the standard, not a bonus. When the machine starts to fall short, investigate early and return it to the condition required for dependable trade work.